How Can We Help?
MicroSIP Configuration
MicroSIP is a complete SoftPhone application for use on Microsoft Windows PCs. Just like any of our hardware devices, it is capable of communicating with many different SIP-based telephony providers. In this article, we will demonstrate how to connect to the Loyalty Forge phone service.
Note that you will require specific credentials for MicroSIP that are different from the credentials you use for your mobile softphone application. This is because MicroSIP communicates with our servers directly without needing to involve Apple or Google's push services. If you require these credentials, please email support@loyaltyforge.com.
Download the latest version of MicroSIP from The MicroSIP Website

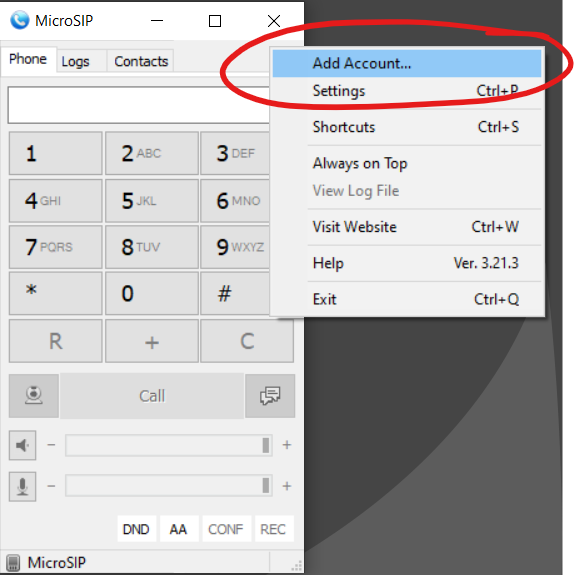
After installing and launching MicroSIP for the first time, there will be no account listed in the bottom right of the window. In the top right next to "Contacts", click the down arrow and select "Add Account..."
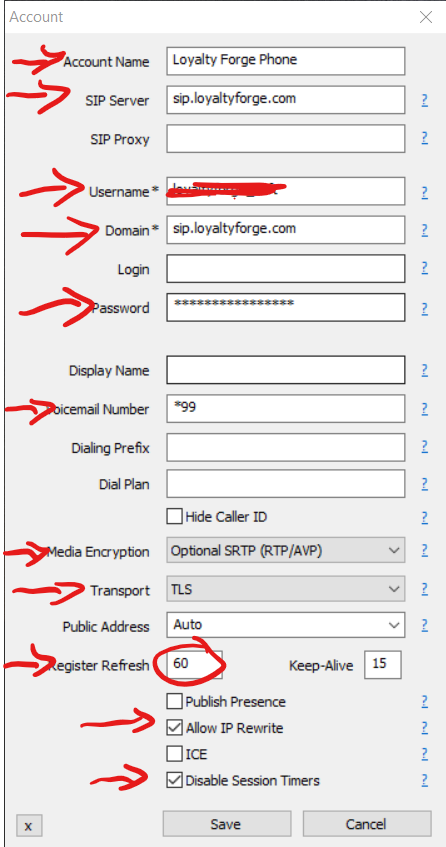
Enter the configuration information as shown, then hit Save.
- Account Name: Anything you like.
- SIP Server: sip.loyaltyforge.com
- Username: The username provided to you by Loyalty Forge Support
- Domain: sip.loyaltyforge.com
- Password: The password provided to you by Loyalty Forge support
- Voicemail Number: *99
- Media Encryption: Optional SRTP
- Transport: TLS (other options will work, but TLS is more secure).
- Register Refresh: 60
- Allow IP Rewrite: Checked
- Disable Session Timers: Checked


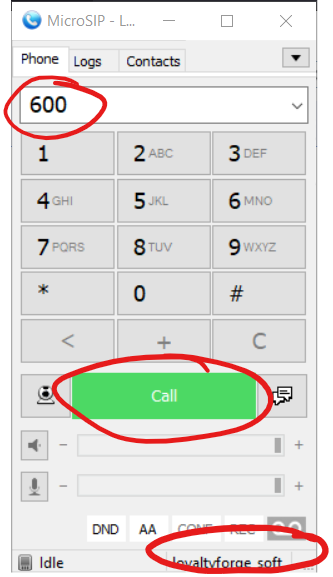
MicroSIP is now operational and you will see your account name in the bottom right. You can test operation by calling 600 to perform an echo test.
