
How Can We Help?
Telnyx: Step 1 – Configure Messaging Profile
The first step in configuring your Telnyx account will be to set up a Messaging Profile that we will use in order to send SMS messages.
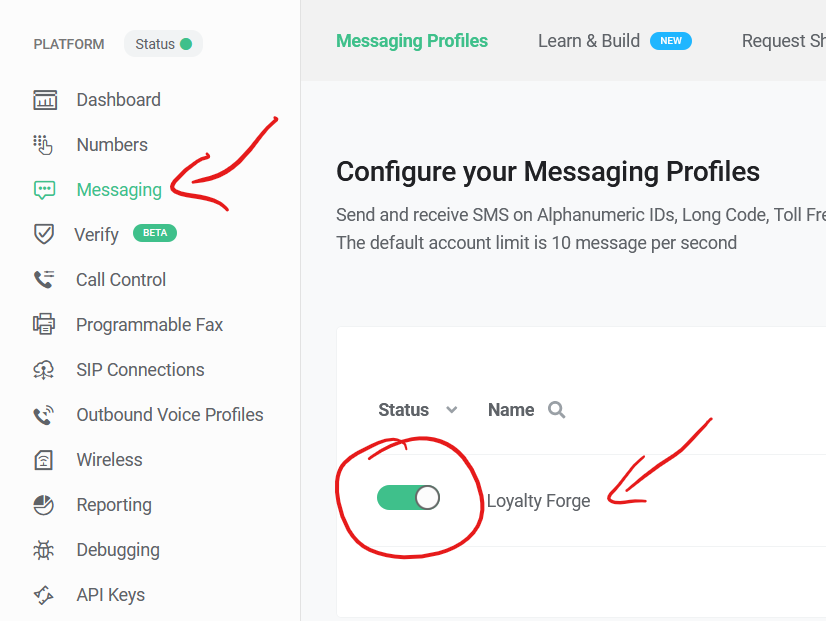
- Sign in to your Telnyx portal.
- Click “Messaging” on the left.
- If this is your first time using Telnyx, then they have probably created a first Messaging Profile for you. Ensure it’s enabled under “Status” and then click on the profile name to edit it.
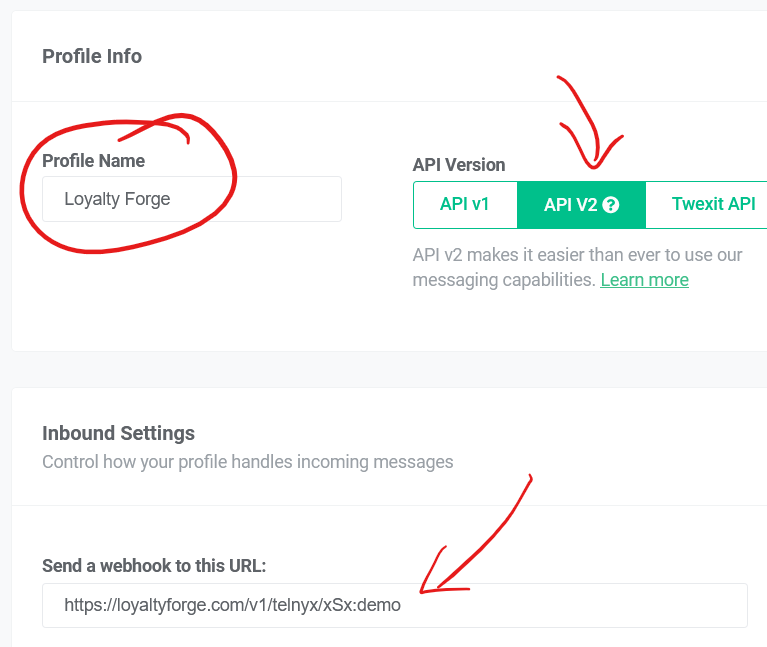
- Give your profile a name. You can give this any name you like.
- Ensure API V2 is selected.
- Enter the webhook URL that your contact at Loyalty Forge provided you. This URL is specific for your instance, so you should not simply enter the one pictured here.
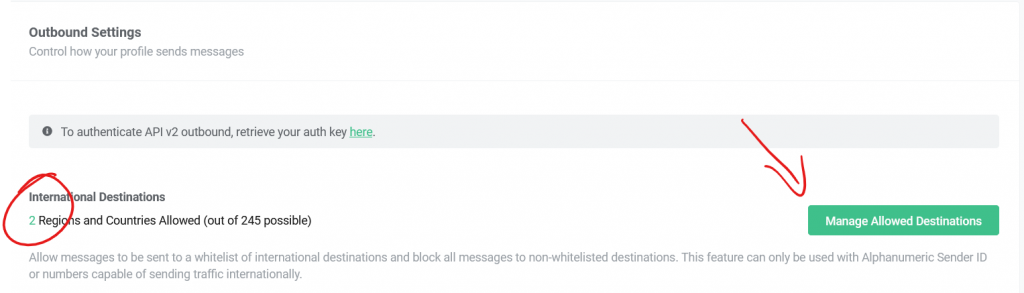
- Set up geographical destinations where we will allow text messages to be sent. This defaults to the whole world, so is not required that you configure it, but it is recommended that you only select countries and regions where you do business.
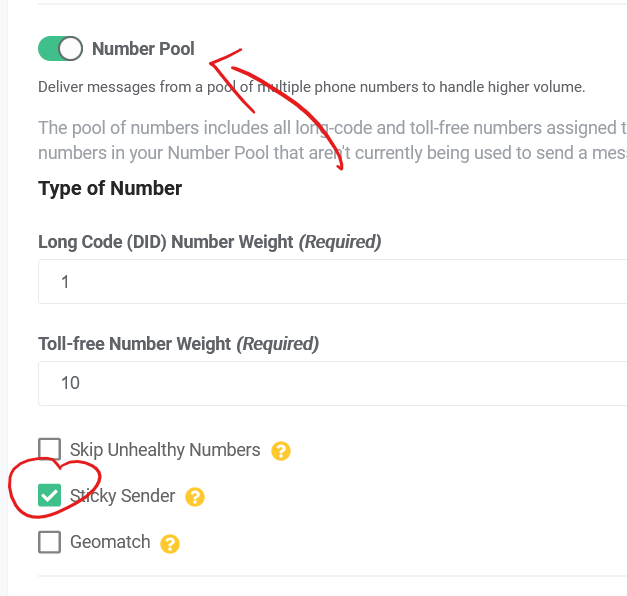
- Enable the Number Pool. Even though we are likely only setting up one phone number, the Loyalty Forge application sends via number pools as this is more powerful and does allow multiple source numbers should you decide to use that feature.
- Enable Sticky Sender so that if you add more numbers to your pool in future, customers will still hear from you from a familiar phone number.
When you’re finished editing, you can hit the “Save” button. We’re done configuring your messaging profile.